building a house into a hill with Sims 3 and providing house access on top and bottom level
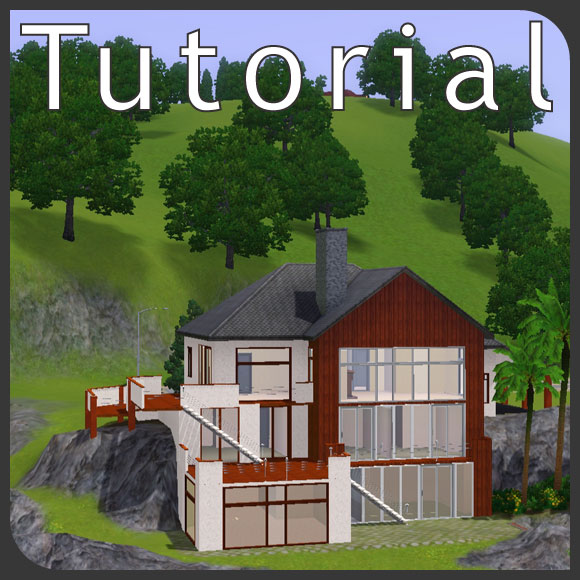
German version – Tutorial: Hanggrundstücke - in den Hang gebautes Haus
Available hillside lots
There are three hillside lots in official sims 3 worlds available. Two of them are located at Sunset Valley:
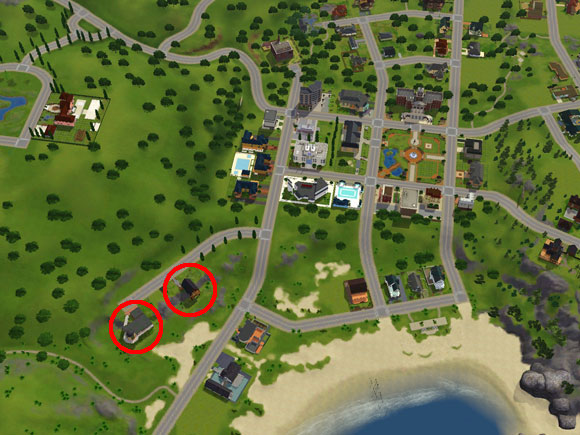
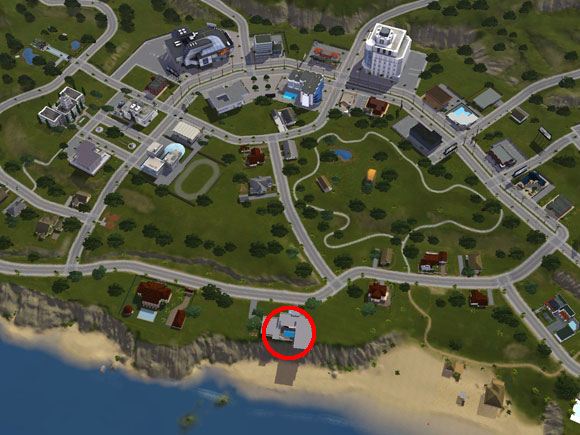
You can find the third hillside lot at Starlight Shores coming with the expansion Showtime:
Decide for the number of hill levels
In Sims 3 a level measures 16 stair steps or 4 squares.
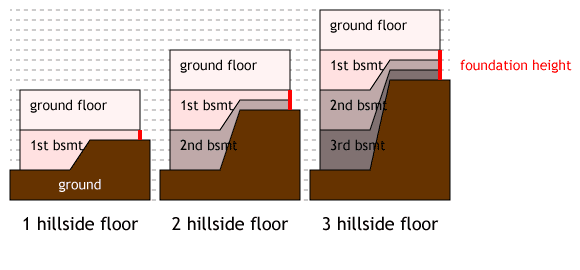
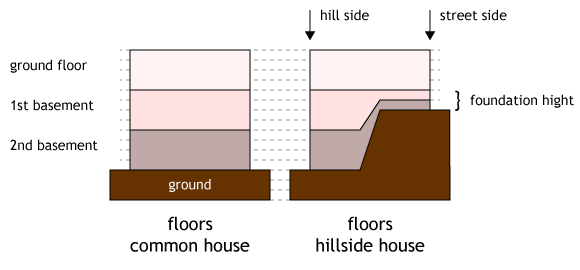
Building a house into a hill means that the outer top level part of a hill floor has to be compressed up to a height of only 4 steps. This part of the floor stays above the top level ground. The lower three quarter of the floor will be pushed downwards and into the hill. This is what the construction would look from the outside in side view:
The hill heigt in combination with your taste decide the number of floors you'll build below your main floor. Your decision about the number has influence on the foundation height showing on the upper level:
Choose a lot and build the main part of the house
I chose a lot at Sunset Valley and bulldozed the building on it:
 The hill slope on this lot is about 28 stair steps high. I measured it with pulling stairs form top to bottom level. This will give me enough height for the main floor plus 2 hill basements (2x12 steps = 24 steps needed).
I build the body of the house starting with foundation and add two levels of walls:
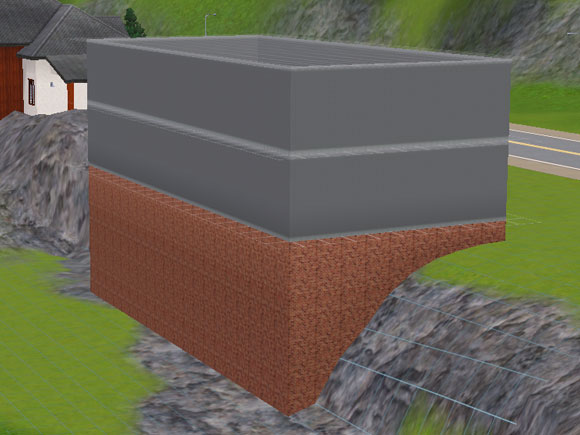
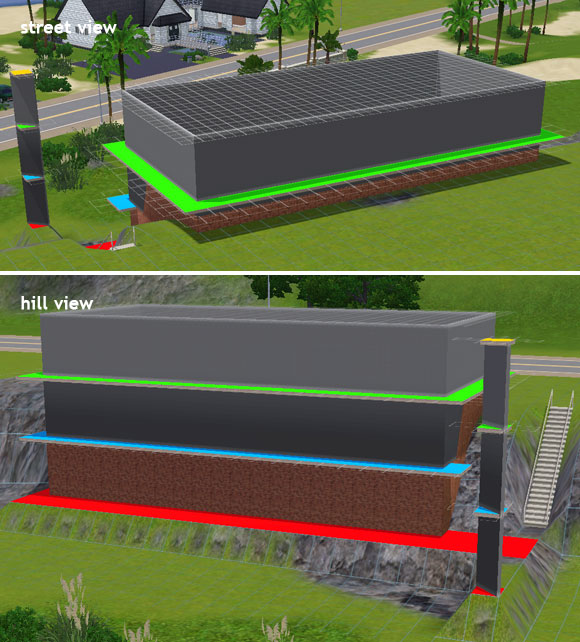
Construction helpers at the bottom level
We need construction helpers for leveling all floors correctly. Choose stairs and pull them down the slope: You need 12 steps/3 squares for each of your basement floors (main floor does not count!). My stairs have to be 24 steps/6squares long.
Stack as many walls as you have floors on the same ground level as the stairs end:
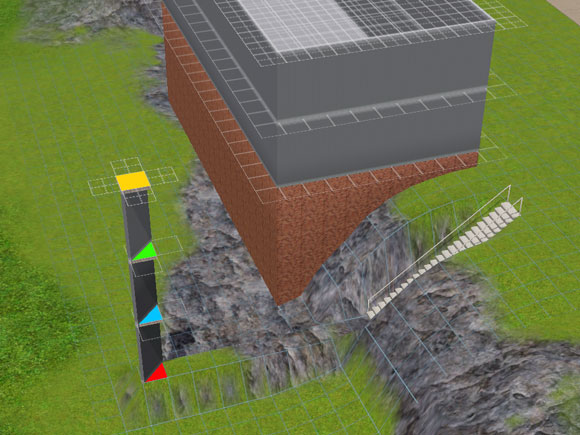 This will give us four important levels:
- red: floor height of the lower second basement floor
- blue: ceiling height of the lower second basement floor or floor heigt of the higher first basement floor
- green: ceiling height of the first basement level or floor hight of the main floor
- yellow: ceiling hight of the main floor
Leveling floors and ceilings
Building a house into a hill means massive use of the Cheat constrainfloorelevation and the terrain tool > level terrain.
Start without cheat and choose the level terrain tool. Level the lot terrain to the red height in front of and unter den foundation. Look careful at the picture, please: do not level the outer squares, where the hill slopes. This would bring your hill down:

Now we need the cheat: type constrainfloorelevation false in your cheat console. We will level out all upper floors as well.
At the blue level you need to leave out the outer squares again as well as you did on the red level. Otherwise you would bring down the hill:
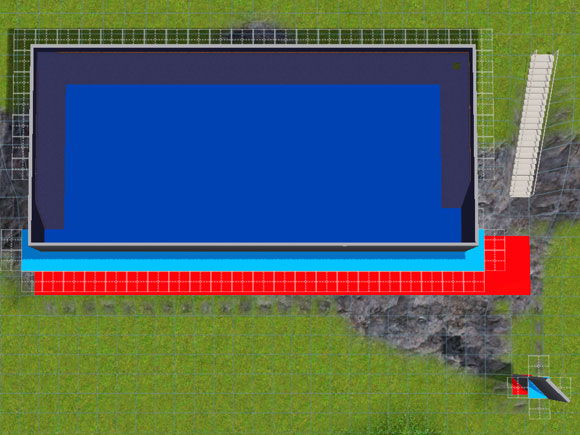 The green level has to be leveled out in total including the outer squares:
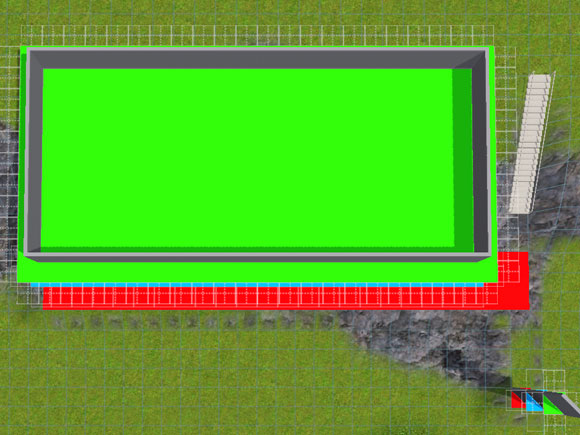
You house should look like this now:
Construction helpers at the top level
Working with constrainfloorelevation and the level terrain tool will cause a lot of accidental wall height errors. To manage them easily we will build another helper construction on the upper hill level.
Stack again three walls and equal them to the hight of your floors on the top hill level:
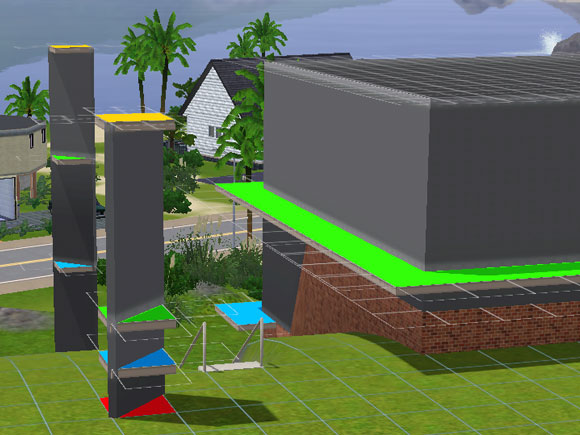 You can use both construction helpers along your building process to correct wall height mistakes.
Preparing floors for floor plan construction
First turn the cheat of with constrainfloorelevation true. Delete the inner part of your basement, keep the outer squares. They will hide the terrain difference between hill and floor:
 Close the front of the lower basement floor with a wall an switch to the upper basement floor. Hide the slanted floor tiles behind walls. You won't be able to use this area for your floorplan, it's again used to hide the height difference:
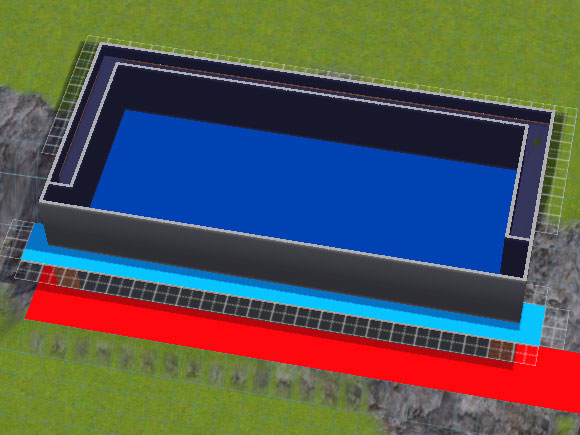 Everything is prepared. You can start developing the floor plan. To enlarge or reduce parts of your house you'll need
 constrainfloorelevation false again. Use the construction helpers to level out your building correctly.
Some information about the stairs leading from the main floor to the street: The stairs can span both ground levels. Sims will walk them. But: you can't have walls under them this way (see Tutorial: Outside stairs with wall under them). For walls you have to split the stairs for each floor and build them seperately:
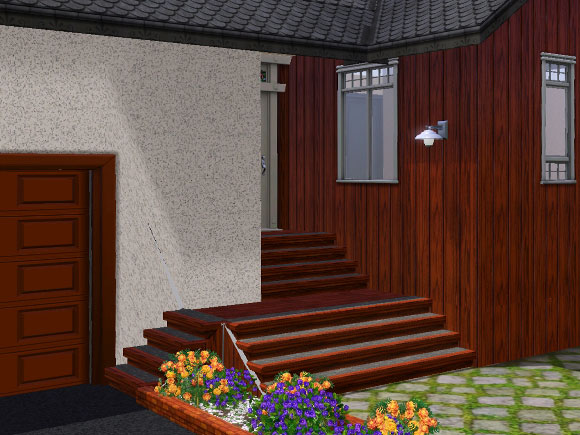 I hope I could inspire you with this this tutorial. Feel free to link your own hillside houses as a comentary.
Please do us a favour and rate this tutorial with stars or vote with thumbs - thank you!
Download houses
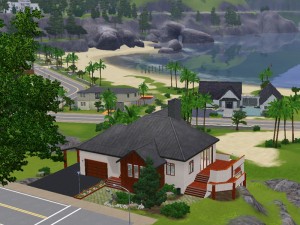 Keanu
Keanu
residential lot with a contemporary family home built with the technique of this tutorial for download:
Keanu – huge hillside house
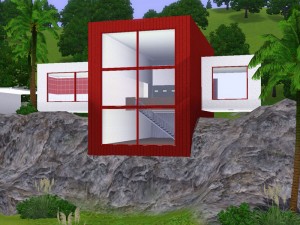 Boerge
residential lot with an ultramodern home for a couple built with the technique of this tutorial for download:
Boerge – ultramodern architect hillside house
It's your turn!
You have questions or suggestions? Please leave us a comment – no registration needed!
We'd like to ask you for your star vote!
More The Sims 3 Tutorials
- seasonal lot marker
- rabbithole design
- rip open basements
- CaSTable ceiling slope | airy rooms
- CaSTable ceiling slope | attic rooms
- outside stairs with walls beneath
- hill side | hovering building
- hill side | building into slope
- pergola
- routable pavilion
- add public picnic
- chaging community lots | live mode


Pingback: The Temperate Mermaid Resort & Hotel | Sims By Jess
@Emilio
Thank you for your compliment. We love to share the possibilities we discovered. The Sims 3 is full of exciting options and there is always something new to find. You reminded us with your comment to translate some of our newer achievements into English again. Thank you!
Thank you very much, this and many others of your tutorials were really useful to me.
PS: sorry for any mistake in my english.