manipulating basement tool basements in The Sims 3: ripping holes of any size into the lot ground and keeping them open, using common walls as outside walls in the basement with the ability to put windows and doors into them, shorten the way into the basement to a 4 steps staircase

Advanced technique - You should have some experience to be able following this tutorial without difficulty!
German version, split into several, more detailed tutorials:
Tutorial: Grundstücksboden – beliebig große Löcher reißen
Tutorial: Kellertool-Keller (teilweise) in ihrer Höhe verschieben
Tutorial: Kellertool-Keller sichtbar und begehbar machen
If you miss an information here you might get it out of the pictures of the German tutorials.
This tutorial has been inspired long ago by this discussion on modthesims: Walk-in basements (picture heavy Thread). Sometime in between I found out by accident how to keep lot grounds open without the neccessity to keep stairs in place. Nowadays this information is well known to some simers. Combining both techniques gives you a hole bunch of new building options.
In this tutorial I am going to build a club with pool (lottype) at the beach of Sunset Valley:
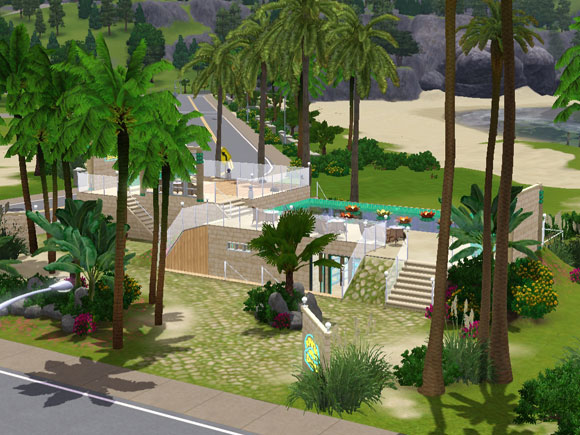 I combine both techniques in this tutorial mainly to offer proper background information for the introduction of a new techenique, I developed on my own - Tutorial: Design your own rabbit holes (on small lots) without downloads.
Overview
In this tutorial we will
- raise the basement above the ground
- open parts of the basement to the open air
- blending the basement into the lot surface
- make the basement accessible via a short stair
Manipulating basements created with the basement tool
Working with those basements and manipulating them against their true function is ambitious. You need patience and a lot of testing to make sure, that Sims will cooperate using your architecure. Test each suspicious structure before building further. For building community lots the Tutorial: Building and testing community lots directly from live mode will safe you time and loading screens.
1. Raising the ground
To keep the stairs into the opened basement later short we need to let the basement poke out of the ground a bit. Depending how short you want the stairs to be, you can raise the ground (and therefore the heigt of the basement) up to:
- 12 steps height for a 4 steps staircase
- 10 steps height for a 6 steps staircase
- 8 steps height for a 8 steps staircase
- 6 steps height for a 10 steps staircase
- 4 steps height for a 12 steps staircase
- 2 steps height for a 14 steps staircase
If just raising the ground to an approximately height satisfies you, just raise the ground to something between 8 or 12 steps.
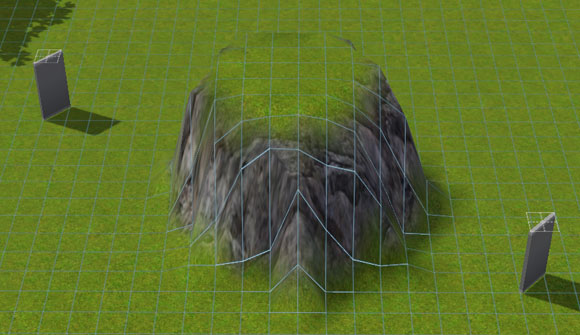
If you are a perfectionist like me, raise the ground higher than a level. Build diagonaly in two lot corners one piece of wall with the hill between them:
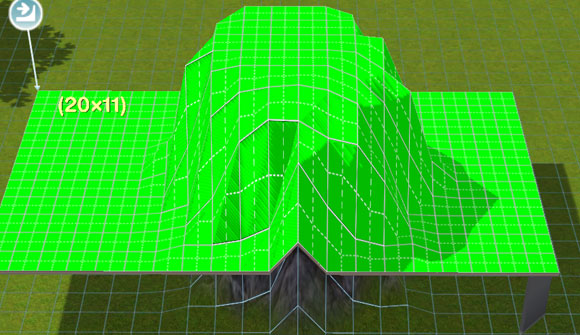
Level the the first floor from one to the other wall. This will shorten the hill to 12 steps height:
From here use stairs to shorten it further if needed. For easiness level out the whole terrain to the desired height. I raised the terrain 8 steps to get stairs of the same lenght of 8 steps for up and down later:

2. Adding the basement
I create a large basement to have freedom construction the floor plan. Not needed parts can easily be deleted later:

3. Developing the floor plan
It's no problem to change inner walls later. But you have to define the outer walls and the area that will be opend. If you want to change those later, you need to repeat all steps to adapt the holes and heights of the outer walls.
This ist my floor plan:

4. Riping the basement open
When finished delete all unneccessary basement parts. The green parts here need to be opend to the outside:
 Opening the ground will take some repeating steps. Put as many stairs into this area as will fit in. Switch to ground level and build foundations at one square distance to all stairs, no mater where exaclty - just one square distance. Build a short stair from the foundation to the basement stairs, though this won't work for Sims, the game excepts this even without cheat (pictures are not(!) from the tutorial lot):
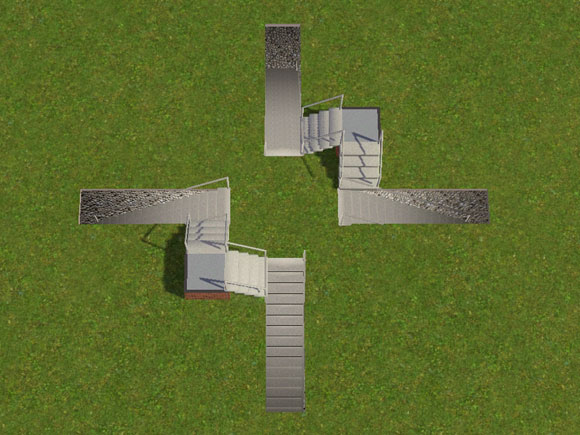
Delete the basement stairs first. The upper stairs will keep the holes open. Afterwards delete the ground level stairs and foundations.
 If the hole is too big, place stairs again:
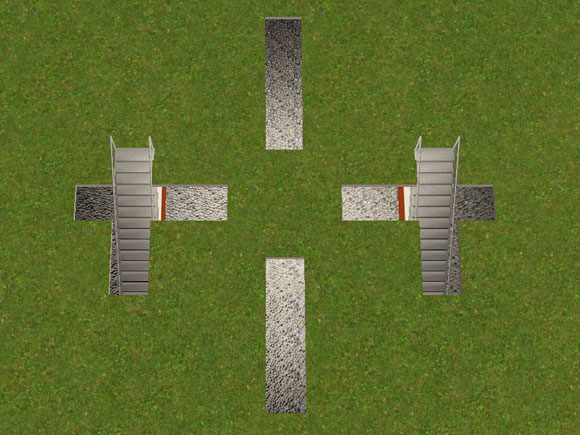
Deleting them without the stairs basement constrauction in place will close the ground above them when deleted:
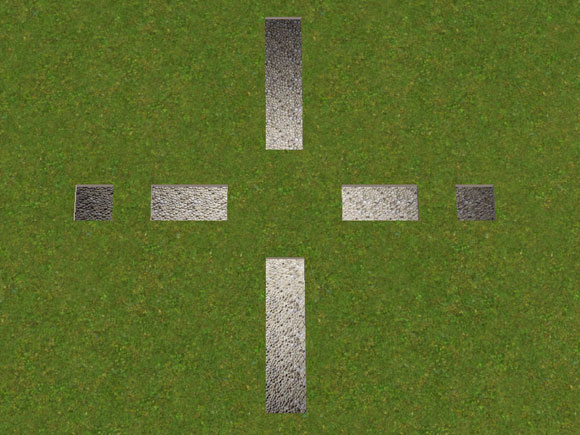 With those options you can rip areas of all sizes and shapes open. Repeat these steps untill the planned area is opened:
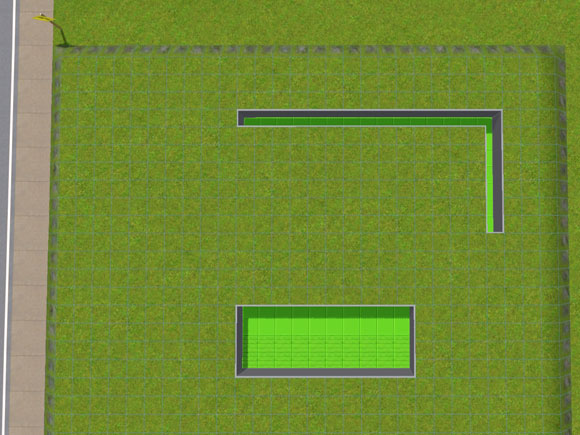
5. Move the outer basements walls down
I am going to lower the street walls in two steps and over 2 squares, the other two sides will be lowered in only one step. To lower the walls the cheat constrainfloorelevation false is needed.
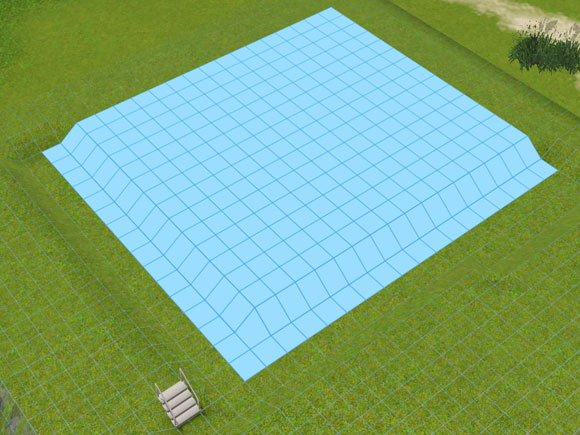
Build a stair and level the terrain from the base of the stairs untill the outer basement walls show:
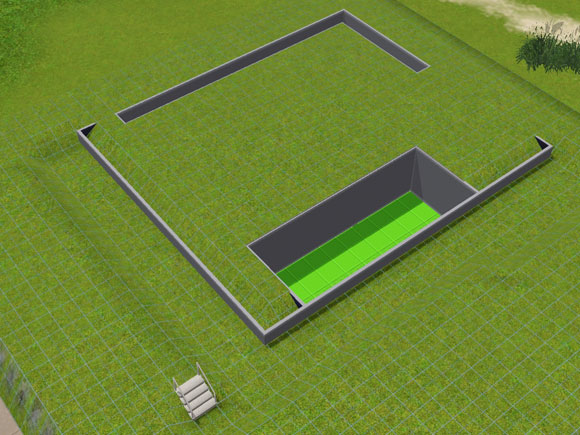
Choose the basement tool and drag a new row of basement from the lower ground to the existing basement:
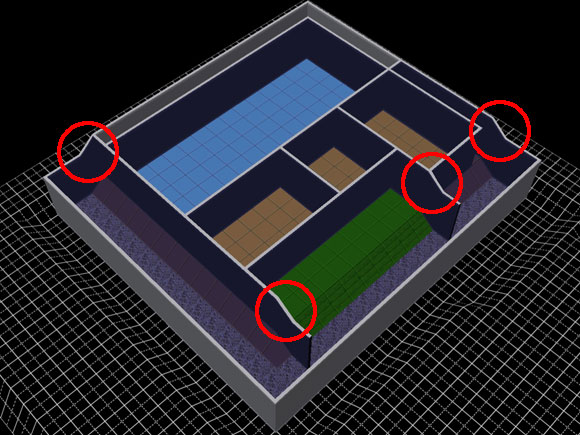
Have a beter look at the changes in basement view:
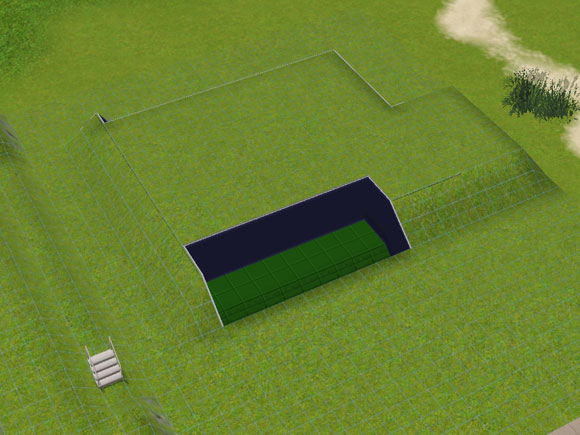
For the second step of lowering the walls the street height of the ground is needed. Level out the terrain as needed and drag again a new row of basement from the lower ground to the existing basement:

With deactivated basement tool it looks like this:
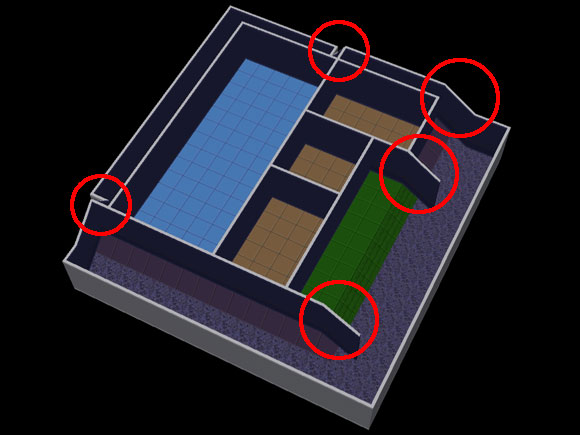
Changes show up best in basement view again:
All new constructed and unneccessary basement parts are deleted with the sledgehammer:
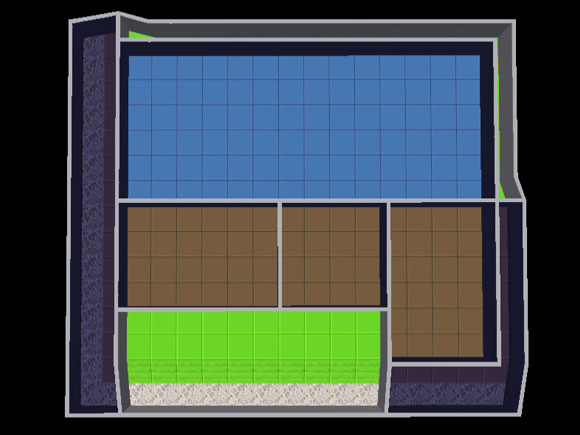
6.Placing the stairs
Turning off the cheat constrainfloorelevation true makes placing the stairs easier. It might be that you need to delete/rebuilt disturbing walls or close newly created and unwanted ground holes:
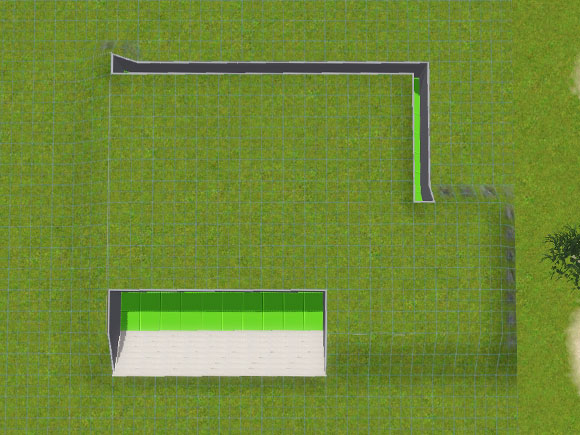
7. Cover up height differences in the basement
Depending on your floor plan some of the height differences in the cellar show up. I hide mine under the stairs. On the two backsides they just don't disturb the look. But if they disturb the look, color them less disturbing or cover them up with plants/rocks. Thing with plants, rocks and objects in genereal is, that most won't show in ground or higher view . I cover up those gaps with objects on both levels to keep them unseen.
The entrance to basement is ready, finish your lot.
Examples
Play with this technique and you will discover tons of options for new kinds of buildings. We show you some of our lots as an inspiration here:
It's your turn!
You have questions or suggestions? Please leave us a comment – no registration needed!
We'd like to ask you for your star vote!
More The Sims 3 Tutorials
- seasonal lot marker
- rabbithole design
- rip open basements
- CaSTable ceiling slope | airy rooms
- CaSTable ceiling slope | attic rooms
- outside stairs with walls beneath
- hill side | hovering building
- hill side | building into slope
- pergola
- routable pavilion
- add public picnic
- chaging community lots | live mode




@Carl Ley
Do you drag the new basement rows from the lower terrain just to the edge of your basement? Your description sounds as if you drag it over the hole basement: The dragging lowers all parts that are touched by the new basement. Just drag it to the edge of your floorplan and just this part will be lowered.
How exactly do you Get the basement to look like in the picture, every time I try to replicate the results the basement only sinks deeper into the ground!! Is there some trick to this that I’m missing, or was there a patch or game update that broke this?!!!